


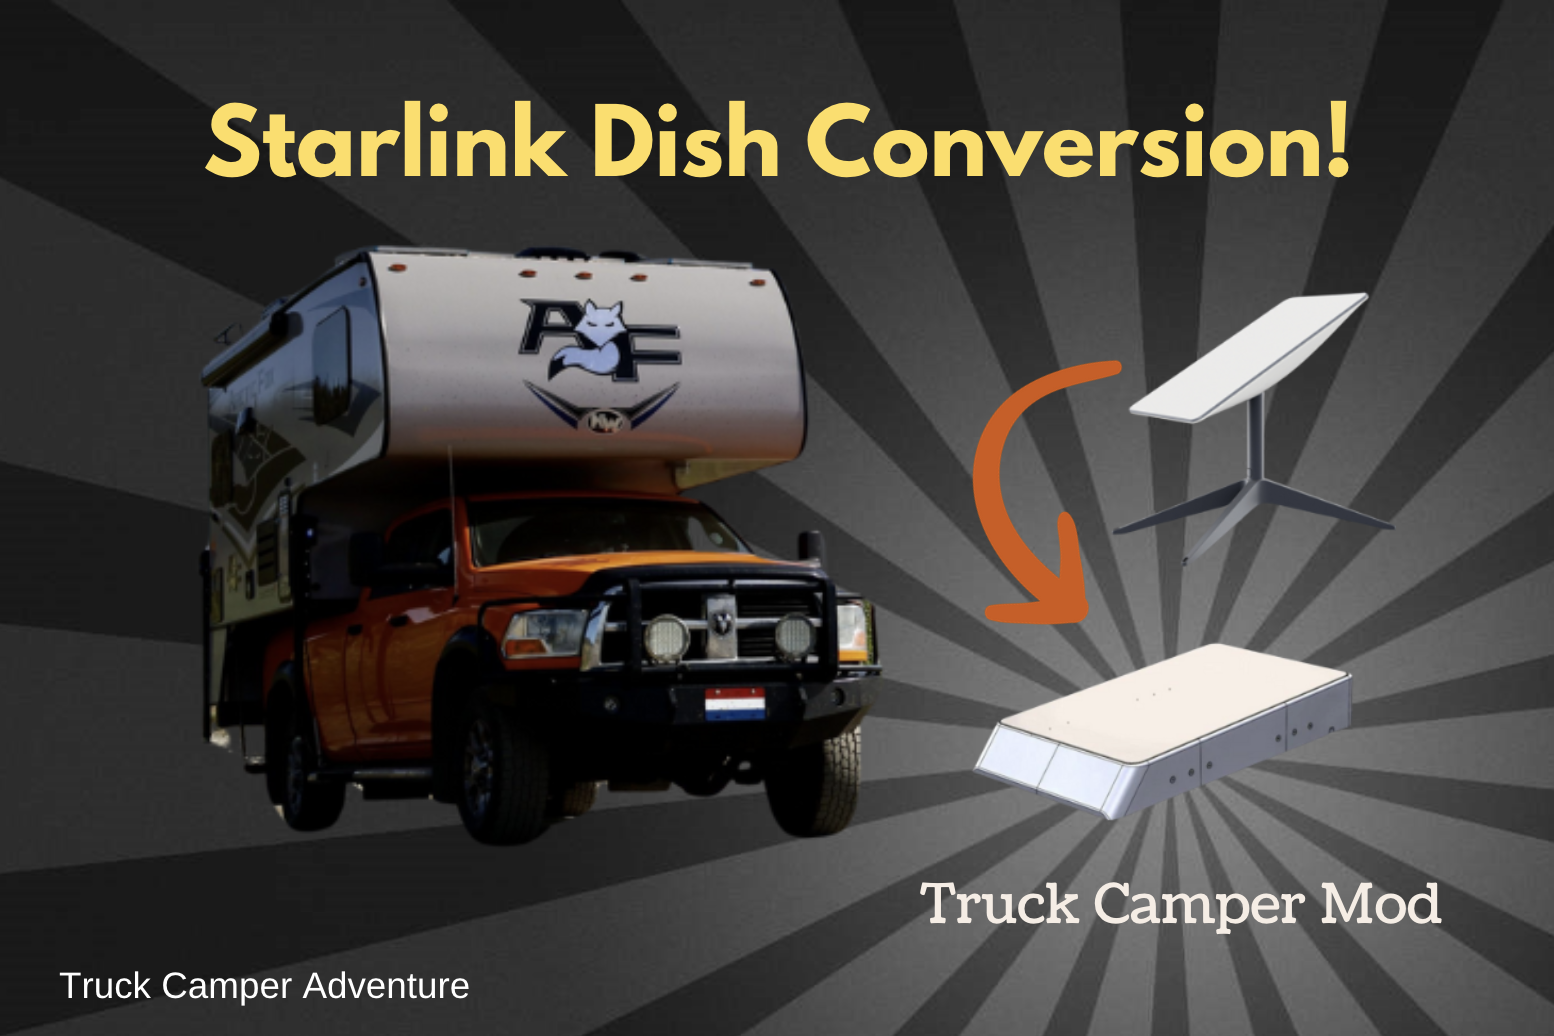
Starlink has revolutionized Internet access for recreational vehicle owners who live and work on the road. At the heart of the Starlink system, is a constellation of 6,000 satellites that provide near-worldwide coverage. No matter where you go in your truck camper, you’ll be able to access Starlink Internet via one of these satellites. In this article, fellow reader and writer, Marinus Brand, shares a relatively simple truck camper modification that makes the Starlink system even easier to use at both camp and on the road.
Starlink for the truck camper? We always hated the idea of not being able to disconnect from the world on our truck camper adventures. Yet disconnecting has little to do with whether you have Internet access or not. It’s about being able to put your phone or tablet away and taking the time to look at the world like we used to.
For Starlink, we opted for a more affordable, refurbished version 2 that came with the same warranty and options as a new Starlink kit but at half the price. Starlink works great. Unfortunately, the rectangular dish is kind of bulky and takes up a lot of space when it’s not in use. A permanent, low profile, mobile mount for the dish seemed like a better solution for our camper.
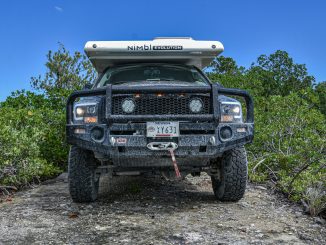
We searched the Internet many nights for a solution and discovered a great YouTube channel called the Everlanders. They designed what we think is the perfect mobile solution using a 3D printed, streamlined cradle for a flat Starlink dish mount on the roof. You’d think that flat mounting the dish would impair reception and speed, but that hasn’t been the case. Flat mounting the dish is actually an option in the Starlink’s settings menu. And due to the sheer number of satellites in the sky (as of this writing, the number of Starlink satellites exceeds 6,000) Starlink will work fine no matter where you are located.
The Everlanders provided a link to the cradle’s 3D plans, though it will need to be “printed” in several pieces (if you don’t already own a 3D printer, you can find a good one for a decent price on Amazon.com.
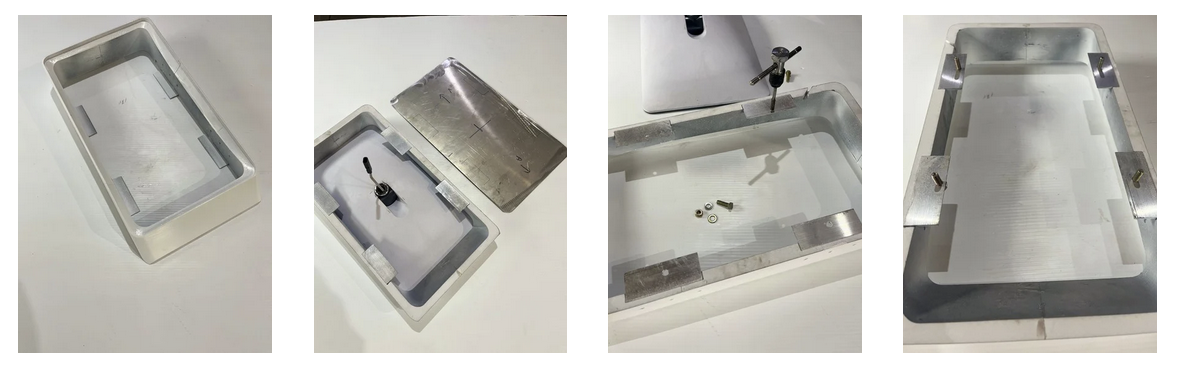
Printing and fabricating the cradle using the Everlander’s plans was fairly simple. Instead of making the mounting brackets pointing to the outside, our brackets are pointing in. We drilled holes in the brackets and tapped threads for 5/16-inch bolts. After this, we made a bottom cover out of aluminum, so we would have a bottom cover that we could seal.
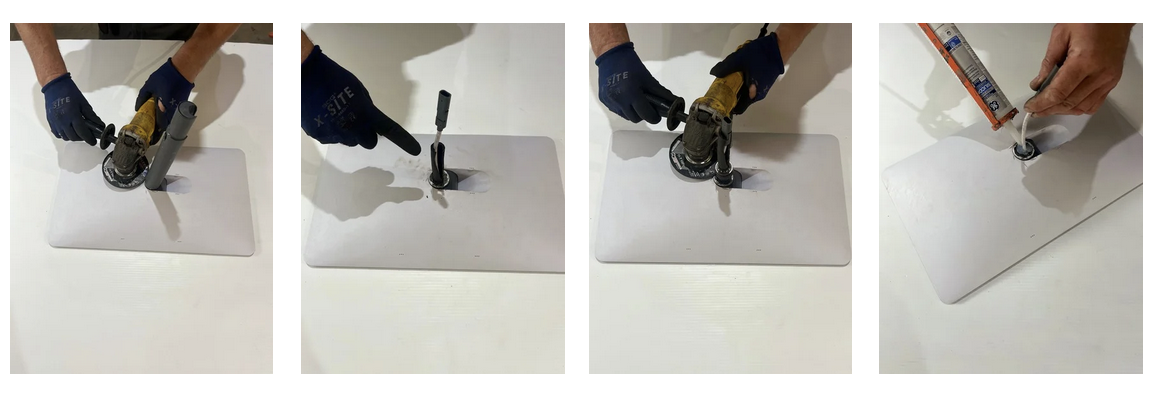
Next, we turned the Starlink dish over. On every YouTube video for flat mounting the Starlink, they cut the back end off and eliminated the motors and deleted the original connector, we didn’t want to do that. So, we carefully cut the outer tube off as close to the dish as possible. After that we pushed the connector out of the outer tube. Using an old coolant hose, we made a sleeve to protect the cable and slid it in the plastic inner tube as far as we could. After cutting the plastic tube, we sealed the hole to prevent water from getting into the Starlink.
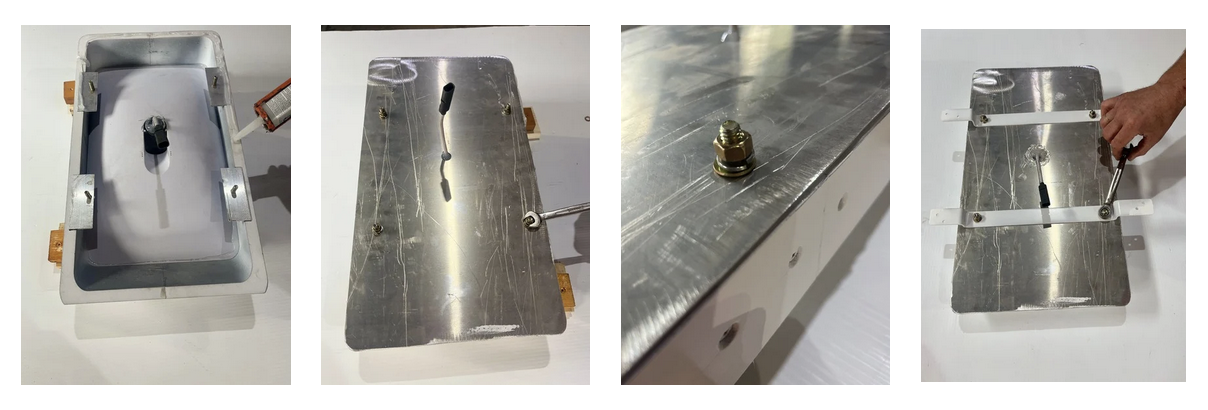
Next, we ran a bead of sealant around the parameter where the dish sits and installed the Starlink dish in the cradle, making sure it was properly seated and sealed. After turning the Starlink and cradle over, we sealed the bottom of the cradle and installed the custom-made bottom plate where we had previously drilled holes for the bolts and the connector. Next, we put nuts on the bolts and C-clamps on the front and back, and let the sealant cure for about 10 hours in order to ensure a good, watertight bond.

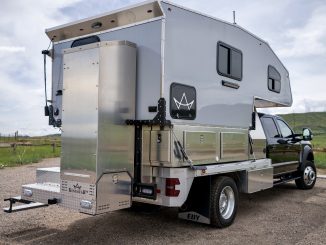
In the meantime, I made brackets for mounting the entire dish assembly to the roof of the camper. Why? Because at some point I would like to be able to remove the entire dish assembly and use it on a future pop-up camper for trips overseas and on my service truck when I’m out in the field (newer diagnostic equipment often requires Internet access). Removing the new dish assembly is easy. I only have to undo four nuts and one connector without breaking the seal to my camper roof and creating a possible leak. It’s easy to get a spare cable for the other rigs.
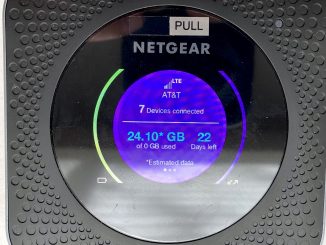
How does the new Starlink dish assembly work? We have tested the system on the road and at camp and the new flat dish assembly works great. While driving at 100km/h we got data speeds from 85 to 135 Mbps. Parked within light trees we still got around 35Mbps, and that is in Northern Alberta. Making calls with wi-fi is just as crisp as using a land line.
As a disclaimer, I have to note that we are using the factory Starlink router right now connected to a 300 watt pure sine wave inverter. In the testing phase, we had it hooked up to 12 volt-48 volt PoE injector. Unfortunately, the parts I used did not keep the power supply stable and caused the connection to drop intermittently. In the near future we want to go back to the 12-48 volt setup when we can find the right parts.
We put a short video of the conversion on our YouTube channel “Martien and Roeby on the Go,” or you can always send us an email, or leave a comment here, if you have any questions.


Be the first to comment